
Welcome to the official documentation for Rebilling Pro. This guide will help you configure the extension, manage your daily transactions, and audit your postings effectively.
1. Getting Started
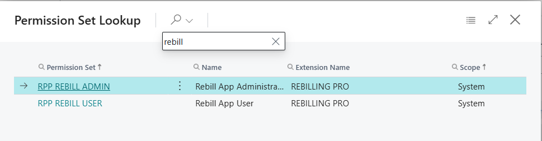
Rebilling Pro integrates directly into your existing Business Central environment. To ensure all features are accessible, please ensure your users are assigned the appropriate Permission Sets:
- RPP REBILL ADMIN: Full access to Setup, Configuration, and all Posting actions.
- RPP REBILL USER: Access to view setups, run reports, and process daily Rebilling transactions.
2. Initial Setup
Before you begin, you must initialize the necessary dimension settings. This is a one-time configuration.
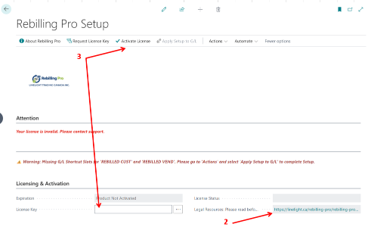
Critical Requirement: Rebilling Pro requires two available Shortcut Dimension slots to function. Before initializing, please verify that your system has at least two empty slots. If all eight slots are currently in use, you must reconfigure your existing dimension usage to free up two slots. The configuration will fail if these resources are not available.
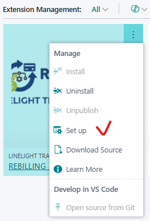
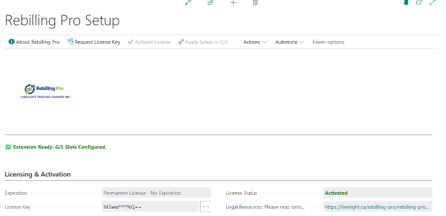
- Navigate to the Rebilling Pro Setup page using Search or from the ‘Extension Management’.

2. Review the Terms and Conditions https://linelight.ca/rebilling-pro/rebilling-pro-legal-terms/#legal
3. Activate License.
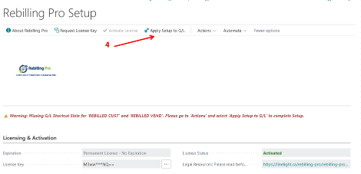
4. Click the Apply Setup to G/L button. This action automatically synchronizes your G/L accounts with the required shortcut dimensions.
3. Daily Operations
Rebilling Pro is designed to work within your standard Business Central document workflow.
Processing Purchase Invoices
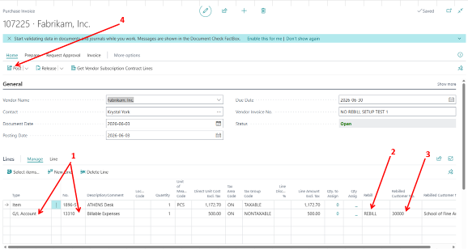
When creating a Purchase Invoice, you can designate specific lines for rebilling:
- Select the G/L Account on your invoice line.
- In the Rebill field, select ‘REBILL’.
- In the Rebill Customer No. field, select the customer who will receive the rebilled invoice.
- Post the Purchase Invoice and review the entries.
Generating Sales Invoices
When you are ready to rebill the customer:
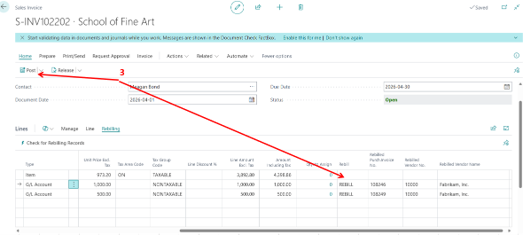
- Create a new Sales Invoice for the selected Customer.
- Navigate to the line area and select Rebilling > Check for Rebilling Records.
3. The system will automatically populate the lines with pending rebilling transactions. You can then review and post the document as normal.
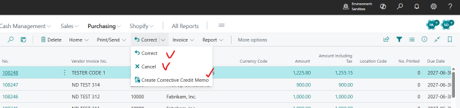
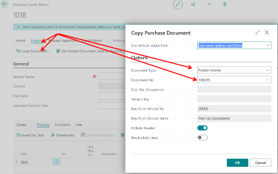
Credit Memos
Rebilling Pro fully supports Business Central’s native Credit Memo workflows. Whether you use the ‘Correct’, ‘Cancel’, or ‘Create Corrective Credit Memo’ function, the system will ensure that the rebilling records are adjusted or reversed in alignment with your document posting.
4. Reporting & Verification
You have two primary ways to monitor your rebilling activity:
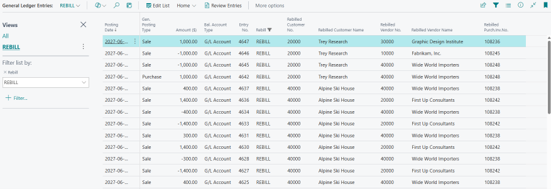
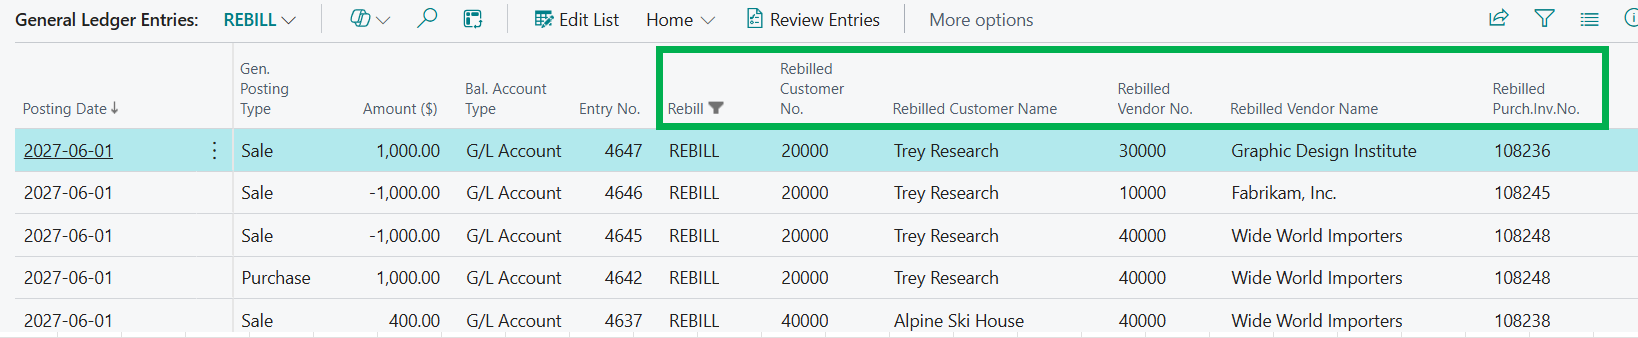
- G/L Ledger Entries: Open the G/L Ledger Entries page. You can filter by the Rebill field to see all related postings. This view is fully compatible with the “Open in Excel” feature for deeper financial analysis.
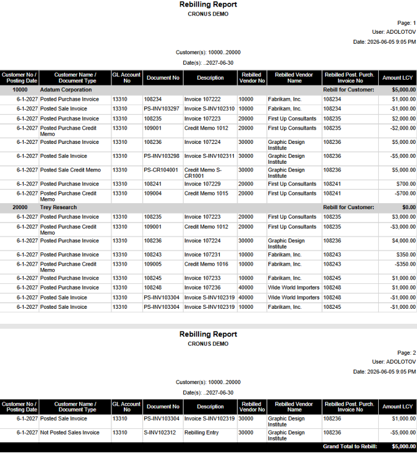
- Rebilling Report: Use the dedicated Rebilling Report to generate a clear, concise audit trail of rebilled transactions filtered by Customer.

5. Troubleshooting & Tips
We are committed to a smooth experience. If you encounter any of the following, here are the standard resolutions:
- Browser Compatibility: We recommend using Microsoft Edge for optimal performance with Business Central. Some features, such as deep-linking from reports or opening documentation pages, may be restricted in Chrome or other browsers.
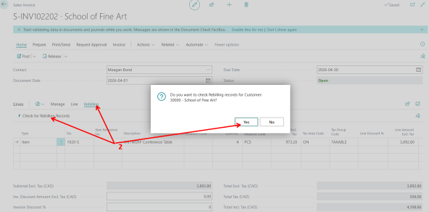
- Handling Dimension Prompts: You may see a validation prompt regarding a ‘SALESPERSON’ dimension set. This is a Business Central configuration requirement, not an application error. Simply click ‘Yes’ to allow the system to automatically populate the required dimension values.
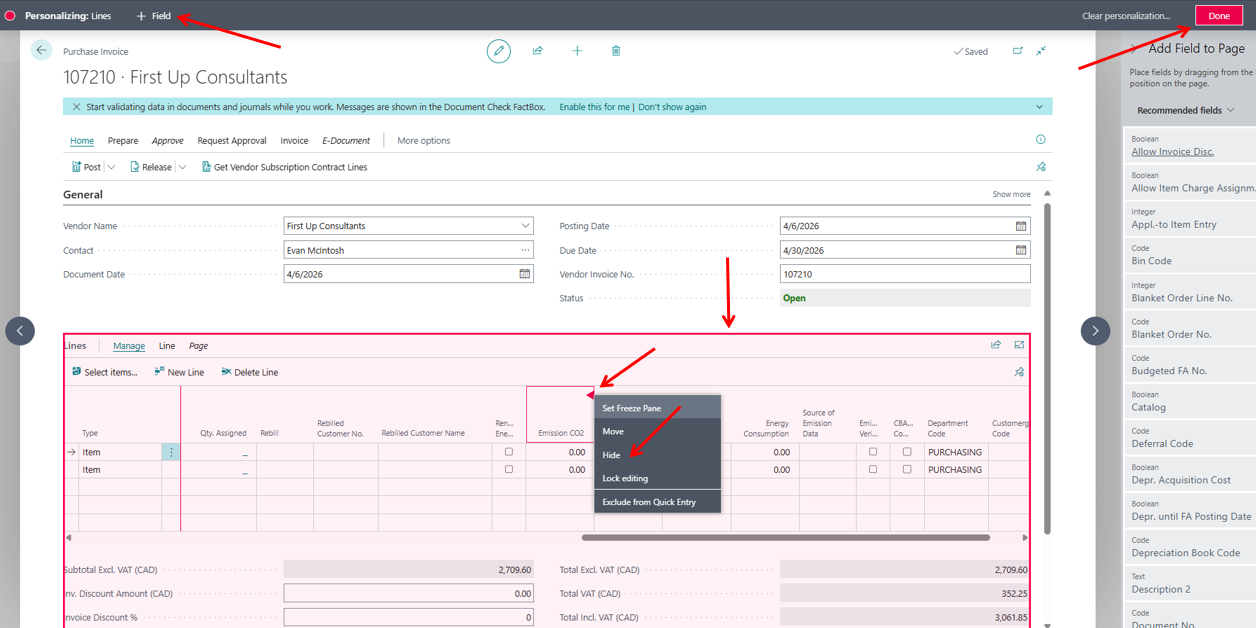
- Optimizing Your Workspace: You can use the standard Business Central ‘Personalize’ feature (found under Settings) to declutter your view by hiding fields irrelevant to your daily tasks on Documents and G/L Ledger Entries.
⚠️ Critical: Essential Fields When personalizing, please DO NOT hide the following fields. These are required for reviewing and verifying your rebilling data after posting:
– Rebill
– Rebilled Customer No.
– Rebilled Customer Name
– Rebilled Vendor No.
– Rebilled Vendor Name
– Rebilled Purch.Inv.No.
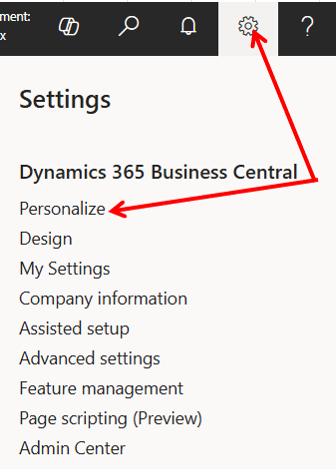
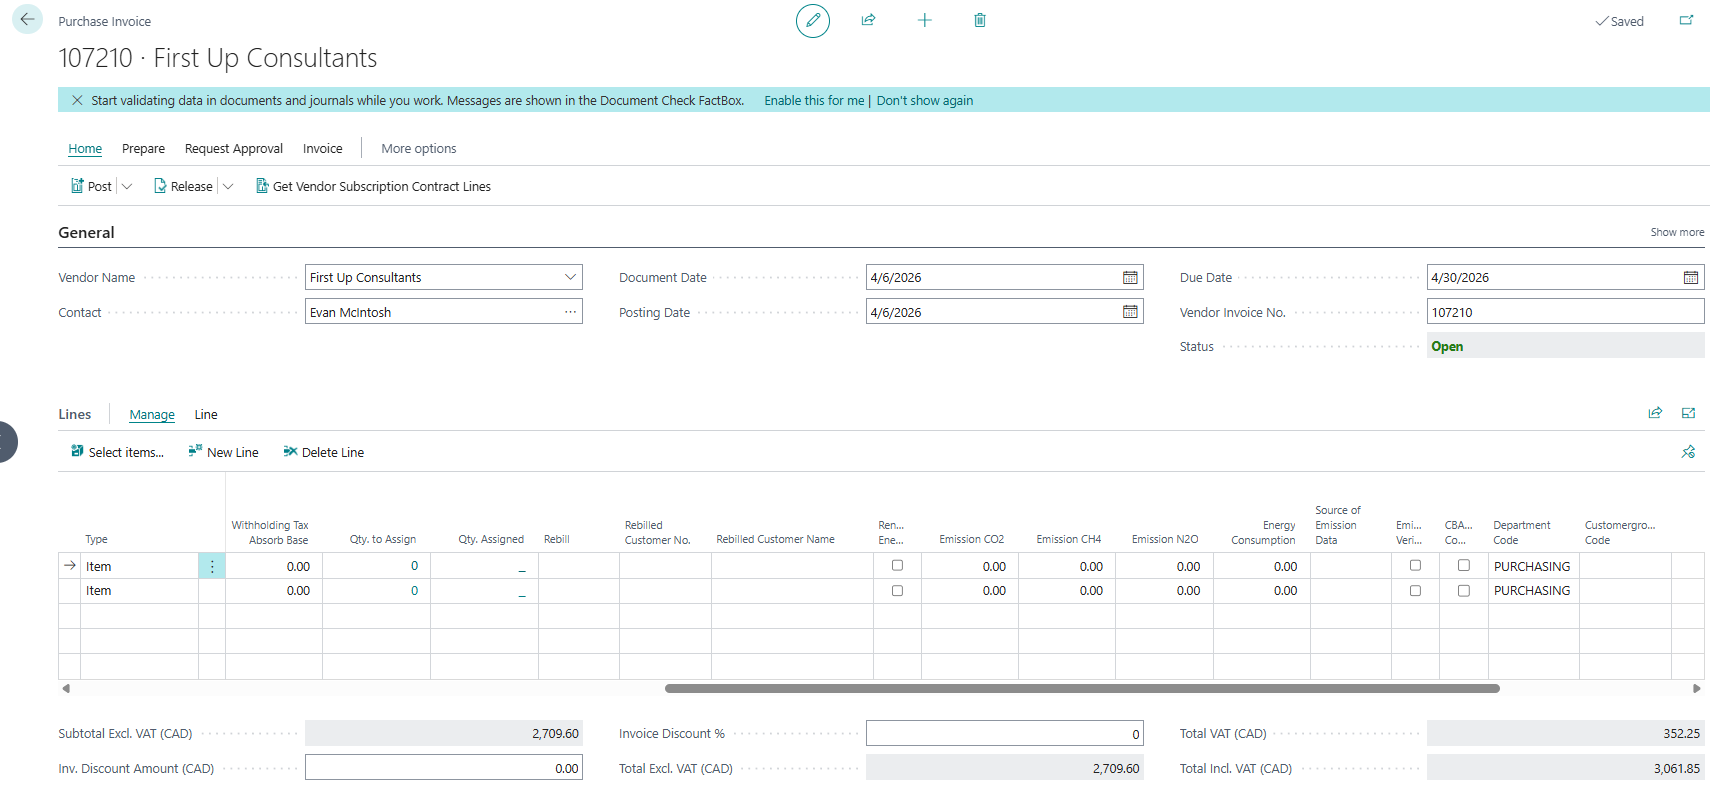
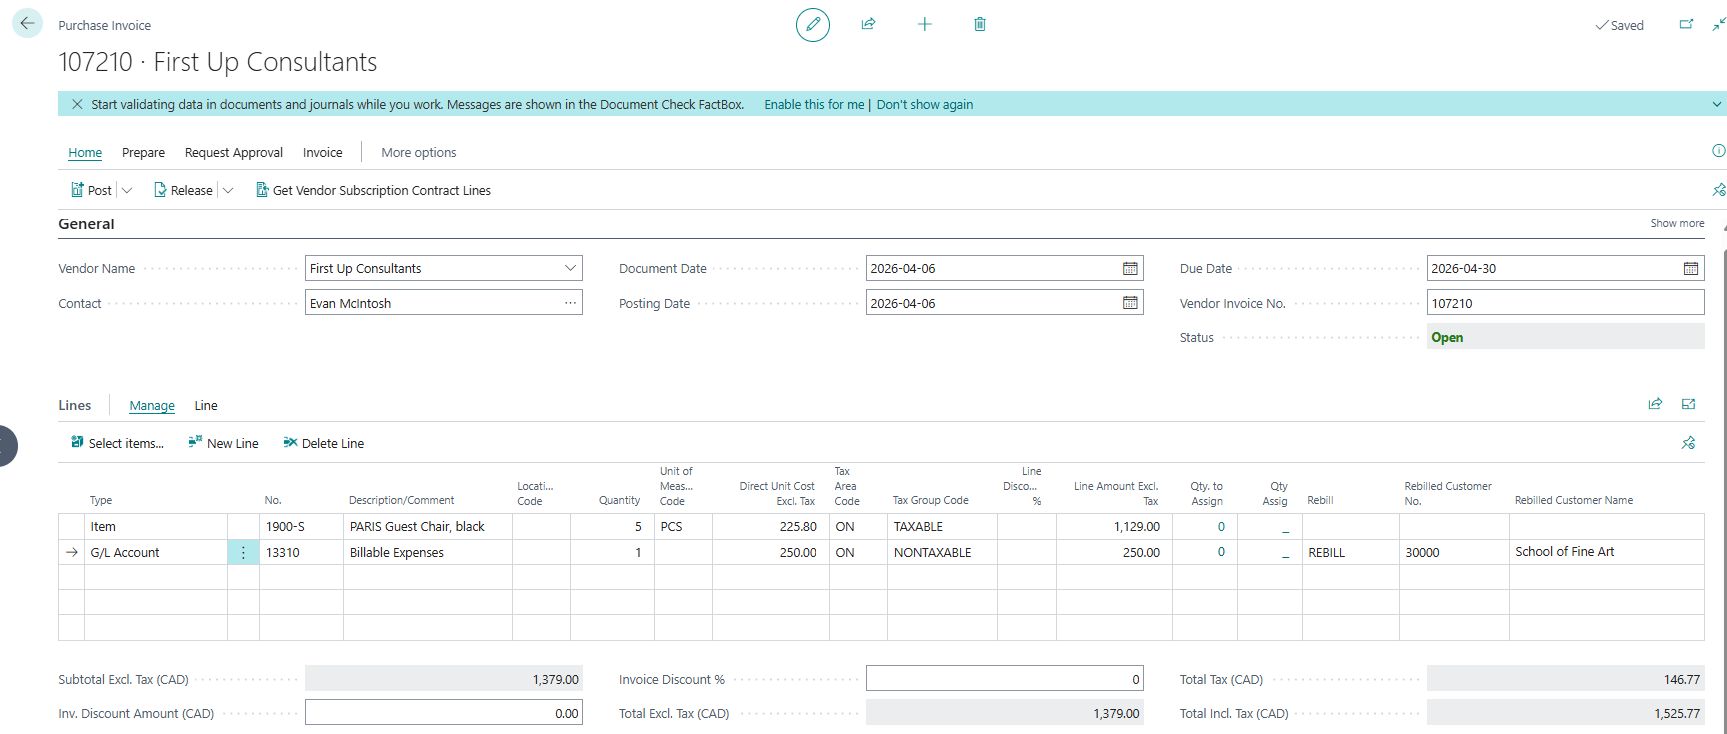
Using Personalize to hide Fields
Purchase Invoice Before
Purchase Invoice After
Fields to keep on the General Ledger Entries
6. Video Tutorial
For a comprehensive walkthrough, watch our full video guide.
Need Further Assistance?
If you have questions not covered in this manual, our support team is happy to help. Please contact us at support@linelight.ca To help us resolve your issue faster, please include a screenshot of any error messages you see and your current Business Central version number.